
Photography
Airbnb Photography Tips That Drive Short-Term Rental Bookings
October 26, 2026 · 6 min read
Development Marketing
The right shot list for commercial real estate photography in BC is set by the audience and the transaction, not by the building type. An investor reviewing an offering memorandum needs different frames than a prospective tenant browsing a leasing page, and a property manager documenting building condition needs different frames again. Before anyone picks up a camera, decide who is looking and what decision the images have to support. Everything below assumes that decision has been made.
Five common purposes produce five different priorities:
Write the purpose at the top of the shot list. It settles most later arguments about what to include.
| Asset | What it communicates | When it matters most |
|---|---|---|
| Primary elevation stills | Identity, scale, condition | Every purpose |
| Aerial stills | Lot layout, roofline, access, surroundings | Sale, development, land |
| Lobby & common areas | Standard of finish and upkeep | Leasing, management |
| Amenity spaces | Lifestyle and tenant value | Multifamily leasing |
| Representative units | Layout, light, finish level | Leasing, sale |
| Detail images | Build quality and materials | Premium positioning |
| Neighbourhood context | Location, transit, amenities | Out-of-area buyers and tenants |
| Horizontal video | Narrative walkthrough | Sale, development |
| Vertical reels | Social distribution | Leasing campaigns |
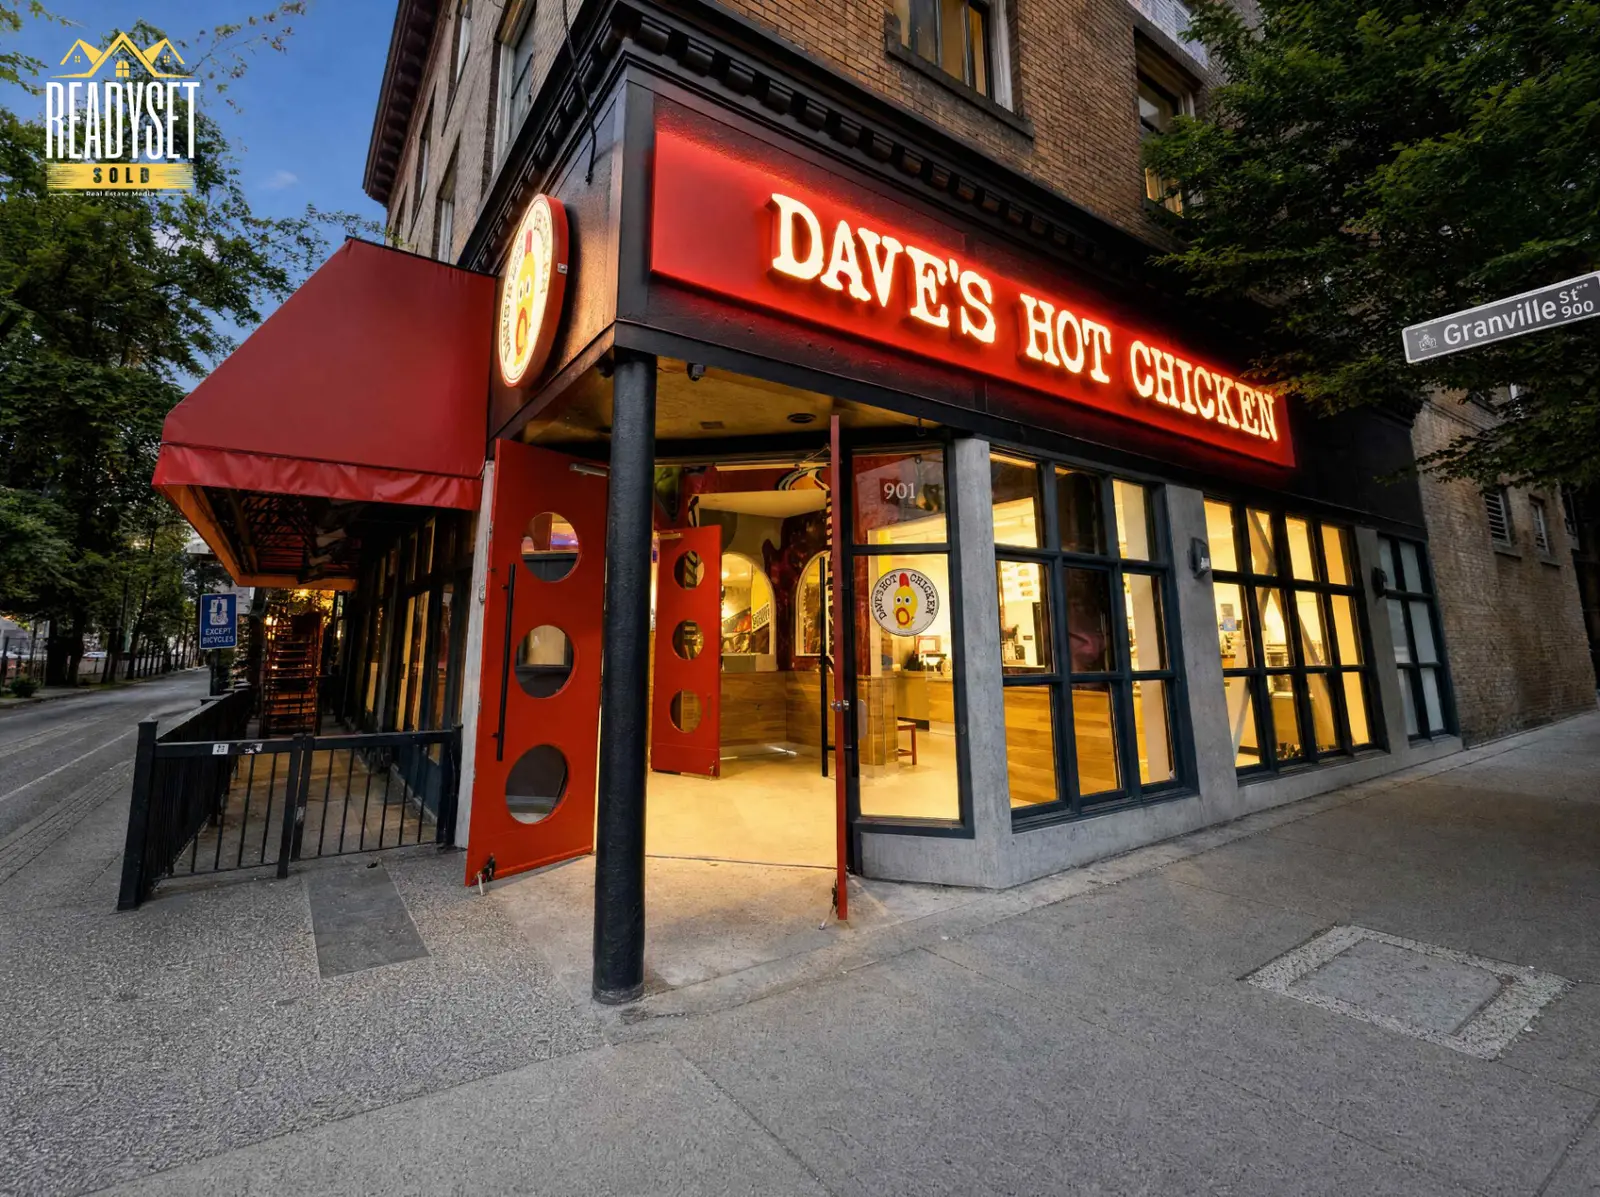
Exteriors carry the first impression and most of the credibility. Plan for the primary elevation as the hero, then secondary elevations so the building reads as a three-dimensional asset rather than a façade. Include signage and address identification, main and secondary entrances, loading bays, parking areas and vehicle access, the streetscape the building sits in, landscaping, and honest coverage of exterior condition — including roofing, cladding and hardscape where visible and relevant. For management documentation, condition frames matter more than flattering angles.
Aerials answer questions that ground photography cannot: roofline and rooftop equipment, full lot layout and parking count, the relationship between the building and adjacent roads or transit, ingress and egress, and the surrounding neighbourhood fabric. For land and development sites, a set of aerials is often the most useful part of the package.
Availability is conditional. Aerial capture depends on weather, the specific location, airspace classification, site and building permissions, and the applicable legal operating requirements for the flight — including pilot certification, aircraft registration and any authorization needed for controlled airspace. Downtown and near-airport locations in Metro Vancouver frequently need extra steps. Our overview of drone photography rules for BC listings explains the framework in more detail, and our aerial drone service page covers what we produce.
For multifamily and office assets, the arrival sequence is the product. Photograph the approach to the entrance, the entry doors, the lobby from at least two angles, the mail and parcel area, elevator lobbies, corridors on a representative floor, stairwells where relevant, and bike or storage rooms. Keep these clean and uncluttered — common areas are where a building's actual maintenance standard shows.
Cover amenities only where they genuinely exist and are accessible on shoot day: lounge or party room, fitness area, courtyard, rooftop deck, meeting or co-working space, shared workspace, guest suite, pool or spa. An amenity photographed while under renovation, or a space the building no longer offers, creates a mismatch between marketing and reality — either skip it or caption the current status accurately.
Interior coverage usually runs on a representative-unit basis: one or two units per floor plan type, photographed to show layout, light and finish level. Include the main living area or open floor plate, kitchen or kitchenette, bedrooms or private offices, bathrooms, in-suite laundry and storage, balcony or patio, and any view.
Be precise about identification. A representative suite should be labelled as representative of a floor plan type — it must not be presented as a specific different available unit. Where finishes vary between units, say so. Retail and industrial units follow the same principle: photograph the shell or fit-out as it is, with clear-height, loading and service details where they matter to a tenant.
Detail frames — hardware, tile, millwork, lighting, material transitions, mechanical rooms for documentation — communicate quality efficiently. They are a supplement, not a substitute. A gallery heavy on details and light on honest wide views reads as concealment, so pair every detail set with the full room or space it came from.
Details are also where portfolio consistency shows. If the same asset class is shot the same way across a portfolio — the same framing conventions for entrances, corridors and kitchens — the images become comparable, which matters when an owner or asset manager reviews several buildings side by side. Agree those conventions once, then repeat them.
Location frames help out-of-area audiences: nearby transit, major road access, the retail or business district, parks and public space, and any anchor destination. For investment material, an aerial with the surrounding street grid visible does more work than several ground-level street photos.
Keep location frames factual. It is reasonable to show a SkyTrain station, a park or a commercial strip that is genuinely nearby; it is not reasonable to imply proximity that does not exist, or to present an amenity as part of the property when it is public or belongs to a neighbouring site. If distance matters to the pitch, state it in the caption rather than letting a compressed telephoto frame make the argument.
Add a horizontal cinematic real estate video when there is a narrative — a walkthrough from arrival through amenities to a representative suite, or a development story that needs sequencing. Add vertical reels for Instagram and TikTok when the campaign runs on social and needs short, native-format cuts. Add aerial footage when movement reveals scale or context that stills flatten. If the asset is a single small unit with a simple layout, strong photography alone is often the better spend.
Two production notes save money here. First, video changes the on-site plan: continuous coverage needs cleaner staging, longer occupancy of each space and more predictable light, so it should be scoped before shoot day rather than added on arrival. Second, decide the delivery lengths in advance. A long-form walkthrough, a short highlight cut and a vertical version are three different edits from the same footage, and specifying them up front is far cheaper than commissioning them one at a time.
For leasing campaigns that run over months, plan a small refresh cadence too — seasonal exteriors, a newly renovated amenity, or an updated unit type — so the marketing library does not visibly age while the building keeps leasing.
This is general planning information rather than legal advice, and it should be reviewed against your own obligations and any professional advice you rely on. In practice: obtain written permission from the owner or property manager before the shoot; arrange access to restricted spaces such as amenity rooms, roofs, mechanical areas and parking in advance; give proper notice for any occupied unit; avoid capturing identifiable occupants, employees or their belongings without consent; and be careful with anything that identifies a tenant, such as nameplates, mail, signage and vehicle plates. Our article on rental property photography for landlords and managers goes deeper on occupied-unit logistics.
Match the light to the elevation. Photograph a façade when the sun is on it, not behind it, and check which way the primary elevation faces before setting a call time. Bright overcast is workable and often kind to large glass façades; heavy rain is not, especially for aerials. Twilight exteriors suit buildings with strong lighting design and glazed lobbies. Interiors with big windows shoot best in mid-day balanced light. Build a rain date into the schedule for any exterior- or aerial-dependent shoot.
The sequence should read like a site visit. Someone scrolling it should end up understanding the building's scale, standard and location without needing the caption.
Practical conditions vary. Downtown Vancouver and Burnaby towers usually mean elevator bookings, loading-bay windows and tighter airspace considerations. Surrey, Coquitlam and Langley sites often have easier parking and clearer aerial conditions, but more travel between assets. Richmond, Delta and White Rock introduce their own access, tide, wind and traffic timing questions. Portfolio shoots across several municipalities should be sequenced by travel and light direction, not simply by address order. Our service area page lists current coverage and travel charges.
Commercial and multifamily work is quoted on scope rather than a fixed package, because unit counts, amenity spaces, access complexity and video needs vary so widely. If you are marketing a presale or new development, our guide to builder and presale media for BC developments is a useful companion. To scope a shoot for your building or portfolio, contact us for a custom quote or book a consultation.
Explore our drone service and local media coverage, or request an itemized quote.
Primary and secondary exterior elevations, signage and entrances, loading and parking access, aerials for lot and neighbourhood context, lobby and common areas, amenity spaces that genuinely exist, representative interiors, detail images, and neighbourhood context. The exact list depends on whether the images support a sale, a leasing campaign, development marketing or property management documentation.
There is no fixed number. Coverage is usually planned by space rather than by count: exteriors and aerials, the arrival sequence and common areas, each available amenity, and one or two representative units per floor plan type. A small walk-up needs far fewer frames than a large tower with several amenity floors.
Often yes, because aerials show roofline, lot layout, parking and road access that ground photography cannot. It is conditional though — availability depends on weather, the location, airspace, owner and site permissions, and the applicable legal operating requirements for the flight. Confirm feasibility before promising aerials in a marketing timeline.
Only with appropriate consent. General practice is to avoid capturing identifiable occupants, staff or their personal belongings, and to be careful with details that identify a tenant such as nameplates, mail and vehicle plates. Owner or property manager permission should also be arranged before the shoot. This is general information, not legal advice.
Schedule exteriors for when sunlight is on the primary elevation, which means checking the building's orientation before setting a call time. Bright overcast works well for large glazed façades, twilight suits buildings with strong lighting design, and interiors with big windows generally shoot best in balanced mid-day light. Always plan a weather backup date.
Plan far enough ahead to arrange occupant notice, unit availability, access to amenity and restricted spaces, parking or loading, and any drone permissions — and to hold a rain date. Occupied buildings and multi-asset portfolio shoots need the most lead time because access coordination, not photography, is usually the constraint.
Rated 5.0 stars from 10 Google reviews — read our Google reviews.
Ready to Apply This?
Real estate photography, video, drone, floor plans and 3D tours across the Lower Mainland — listing photos delivered within 12 hours of the completed shoot; other delivery confirmed when you book.
Keep Reading
Photography
October 26, 2026 · 6 min read
Videography
October 3, 2026 · 6 min read
Photography
August 13, 2026 · 8 min read